
Resize Images for Online Forms and Applications
Learn how to resize images for online forms and applications by checking pixels, file size, aspect ratio, and clarity before uploading your photo with ease.
RESIZE IMAGES
5/8/20247 min read
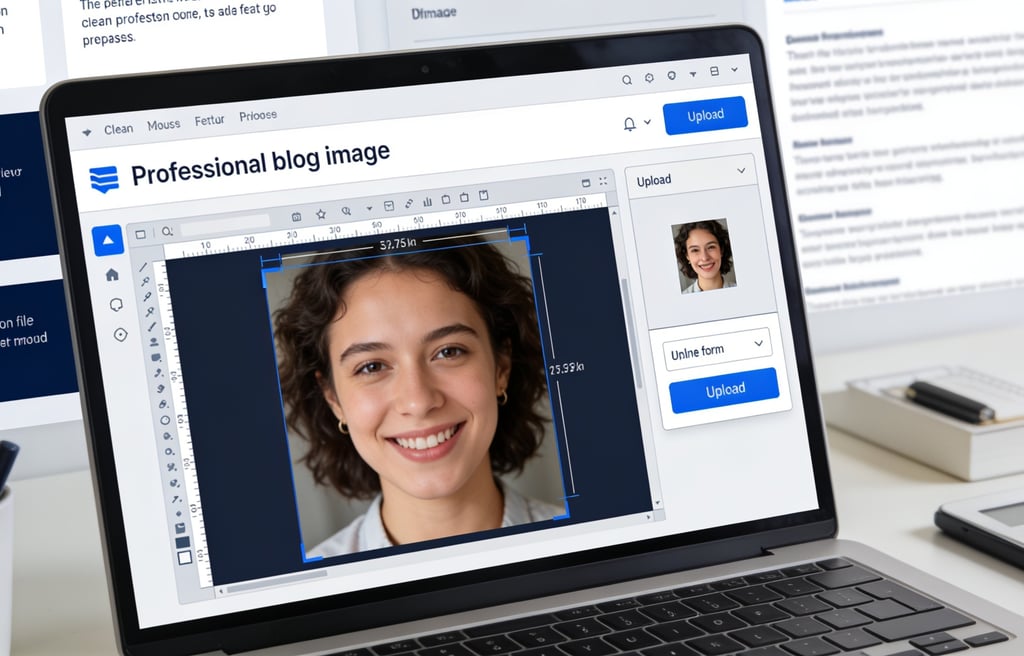
You are filling out an online form, job application, school portal, registration page, or account profile, and the upload box rejects your photo. The image may be too large, the dimensions may be wrong, or the preview may crop the photo in a way that makes it look unclear. This is one of the most common problems people face when submitting files online.
The good news is that you can resize images for online forms and applications before uploading them. Resizing helps you adjust the width, height, pixel dimensions, aspect ratio, and sometimes the file weight so the image is better prepared for the upload page.
This guide explains why image uploads fail, what to check before resizing, and how to prepare your image step by step using practical, simple checks.
Why Online Forms Reject Images
Online forms often have strict upload rules. These rules help the website receive files that are easy to display, store, or review. The problem is that many users take photos with a phone, and phone images are often much larger than what a form needs.
A form may reject your image because:
The file size is too large.
The image dimensions are too wide or too tall.
The image is in the wrong shape.
The photo is blurry after upload.
The file type is not supported.
The upload preview cuts off important details.
The image is too small and becomes pixelated.
The form requires exact width and height values.
For example, a phone photo may be 3024 x 4032 pixels. That can be useful for printing, but it may be too large for a form that only needs a small profile photo or document image. Resizing the image before uploading can make the file easier to submit and review.
Resize Images for Online Forms and Applications: What to Check First
Before changing the image, read the upload instructions on the form. Some websites clearly show the required size, while others only show an error after you try to upload.
Look for details like:
Maximum file size
Minimum image dimensions
Required width and height
Accepted formats such as JPG or PNG
Square, portrait, or landscape shape
Whether the image must be clear and readable
Examples of upload instructions may look like:
“Maximum file size: 2 MB”
“Image must be at least 600 x 600 pixels”
“Upload a JPG or PNG”
“Profile photo should be square”
“Document photo must be readable”
Do not guess when the form gives instructions. Use the exact rules shown by the website whenever available.
Understanding Pixels, Dimensions, and File Size
Many users confuse image dimensions with file size. They are related, but they are not the same thing.
Image dimensions describe width and height in pixels. For example, an image may be 1200 x 800 pixels.
File size describes how heavy the file is, usually in KB or MB. For example, an image may be 4.8 MB.
A photo can have large dimensions and a large file size. But sometimes a photo can have moderate dimensions and still be heavy because of format, quality, or detail.
When a form says the image is “too large,” it may mean:
The file size is too large.
The pixel dimensions are too large.
Both are too large.
That is why resizing should be done carefully. You want the image to fit the form without making it blurry or stretched.
Step-by-Step: How to Resize an Image for an Online Form
Step 1: Start With the Best Original Image
Use the clearest version of the image you have. If the original is blurry, dark, or cut off, resizing will not fix the main problem.
Before resizing, check:
Is the subject clear?
Is the photo in focus?
Is the full document or face visible?
Is the lighting good enough?
Is the image facing the correct direction?
A clean original gives you a better final upload file.
Step 2: Check the Required Dimensions
If the form gives exact dimensions, write them down before resizing.
For example:
600 x 600 pixels
800 x 1000 pixels
1200 x 900 pixels
1024 x 768 pixels
If the form asks for a square image, the width and height should usually match. If it asks for a portrait image, the height should be greater than the width. If it asks for a landscape image, the width should be greater than the height.
ImageToSend’s Smart Image Resizer is the right public tool for this task because it is used for resizing images, changing dimensions, adjusting pixel size, preparing aspect ratio, reducing image file weight, and meeting upload limits.
Step 3: Keep the Aspect Ratio Correct
Aspect ratio means the relationship between the width and height of the image. If you change only one side without keeping the ratio, the image can become stretched.
For example, a face may look too wide, or a document may look squeezed. This can make the upload look unprofessional or hard to read.
When resizing, avoid forcing the image into a shape that does not match the original unless you are cropping it properly. If a square image is required, crop first, then resize. If a specific rectangle is required, adjust the crop carefully before changing dimensions.
Step 4: Resize the Image
Open the image in a resizing tool and enter the required width and height. If the form only gives a maximum file size, reduce the dimensions gradually instead of making the image extremely small.
A practical approach is:
Check the form’s upload rule.
Resize to the required width and height if listed.
Keep the image proportional.
Save a new copy.
Check the file size.
Preview the final image before uploading.
Do not overwrite your original file immediately. Keep the original in case you need to adjust again.
Step 5: Check the Final File Size
After resizing, check whether the file is under the upload limit. If it is still too heavy, you may need to reduce the dimensions a little more or save the image in a more practical format, depending on what the form accepts.
For many photo uploads, JPG is commonly accepted and often produces smaller files than PNG. PNG can be better for screenshots or graphics, but it may create larger files. Always follow the upload page’s allowed formats.
Step 6: Preview the Image Before Uploading
Open the resized image before submitting the form. This final check helps you catch problems before the website rejects the file.
Make sure:
The image is not stretched.
The subject is still clear.
Text is readable if it is a document.
The full face or document is visible.
The image is not too tiny.
The file opens correctly.
The file name is simple.
A resized image should still be useful. Smaller is not better if the image becomes unreadable.
Practical Examples
Example 1: Job Application Profile Photo
A job portal asks for a square profile photo under 2 MB. Your phone photo is vertical and very large.
To prepare it:
Choose a clear photo.
Crop it into a square without cutting off your face.
Resize it to a practical square dimension.
Check that the file is under the limit.
Upload the final version.
This helps the photo fit the upload box without awkward cropping.
Example 2: School Portal Document Image
A school portal asks for an image of a signed form. Your photo is readable but too large to upload.
To prepare it:
Check that all edges of the paper are visible.
Rotate the image if it is sideways.
Resize it while keeping the text readable.
Preview the image before uploading.
Submit the resized copy.
The goal is to reduce the file while keeping the document easy to review.
Example 3: Online Registration Form
A registration page asks for a JPG image with a maximum file size. Your PNG file is too heavy.
To prepare it:
Check whether JPG is accepted.
Convert or save the image as JPG if appropriate.
Resize the image dimensions.
Confirm the file size.
Upload the final version.
Common Mistakes to Avoid
Stretching the Image
Do not force a photo into a new width and height if it makes the image look distorted. Keep the aspect ratio or crop first.
Making the Image Too Small
If you reduce the image too much, it may become blurry or unreadable. This is especially risky for document photos and forms with small text.
Ignoring the Upload Instructions
Every form can have different requirements. Always follow the instructions shown on the upload page when available.
Uploading the Original Phone Photo
Phone photos can be much larger than needed. Uploading the original may cause file-size errors or slow uploads.
Cropping Important Details
When resizing an ID-style image, document photo, or application photo, make sure important details stay visible.
Saving Over the Original
Keep the original image until the form accepts your resized version. That way, you can try again without losing quality.
How ImageToSend Helps
ImageToSend is built for practical file preparation tasks such as online uploads, email attachments, online forms, job portals, school submissions, messaging apps, and document photo preparation.
For this article, the best fit is Smart Image Resizer. It helps you prepare images by adjusting dimensions, pixel size, aspect ratio, and file weight for upload limits. Use it when a form asks for a different image size, when your image is too large, or when you need a cleaner version before submitting.
Need to resize a photo before uploading it to a form? Use Smart Image Resizer at https://imagetosend.com/ to prepare a cleaner image for online submissions.
Final Checklist Before Uploading
Before submitting your resized image, check this list:
The image matches the required dimensions when listed.
The file size is under the upload limit.
The image is not stretched.
The subject is centered.
Text is readable if the image contains a document.
The file type is accepted by the form.
The image is facing the correct direction.
Important details are not cut off.
The file name is simple.
You previewed the final image before uploading.
Conclusion
Online forms and applications often reject images because the file is too large, the dimensions are wrong, or the image does not fit the required upload box. Instead of trying the same file again, prepare a better version first.
When you resize images for online forms and applications, focus on the form’s requirements, the image dimensions, the aspect ratio, file size, and final readability. A properly resized image can help reduce common upload problems and make your submission easier to complete.
FAQ
What does it mean to resize an image for an online form?
It means changing the image’s width, height, pixel dimensions, or file weight so it better matches the upload requirements of a website or application.
Will resizing an image make it blurry?
It can if you reduce it too much or stretch it incorrectly. Keep the aspect ratio and preview the final image before uploading.
What size should I use for online forms?
Use the size required by the form. If the form does not show exact dimensions, choose a practical size that keeps the image clear and under the file limit.
Which ImageToSend tool should I use?
Use Smart Image Resizer when you need to change image dimensions, pixel size, aspect ratio, or prepare an image for an upload limit.
ImageToSend
Practical tools and guides to compress PDFs, resize images, and prepare ID and passport photos for online uploads.
Contact
© 2026 ImageToSend. All rights reserved.
Quick Links