
How to Prepare a Visa Photo for Online Upload Without Overediting
Learn how to prepare a visa photo for online upload without overediting, using safe cropping, orientation checks, and practical steps before you submit one.
ID & PASSPORT PHOTOS
6/27/20266 min read

You have a visa application photo ready, but the upload page asks for a clean, properly framed image. The photo may be slightly crooked, too wide, sideways, or surrounded by extra background. You want to fix it before uploading, but you also do not want to overedit it and make it look unnatural.
That balance matters. A visa-style photo should usually look clear, simple, and realistic. The goal is not to transform your appearance or create an artificial image. The goal is to prepare a visa photo for online upload by fixing basic presentation issues such as crop, orientation, framing, and visible borders.
This guide explains how to prepare your photo carefully, what to avoid, and how ImageToSend’s Document Editor can help with simple browser-based photo preparation.
Why Visa Photos Need Careful Preparation
Online visa forms often use strict upload boxes. Even when your original photo looks acceptable on your phone, it may not fit correctly after upload. The platform may reject the image, crop it awkwardly, or show it in a preview that makes the face look off-center.
Common issues include:
The photo is sideways or upside down.
The face is not centered.
There is too much empty space around the head.
The shoulders are uneven.
The image includes messy borders.
The photo was taken too far away.
The file was cropped too tightly.
The background is distracting.
The uploaded preview cuts off part of the head.
These problems are usually about preparation, not appearance. In many cases, simple crop and orientation adjustments are enough.
Prepare a Visa Photo for Online Upload Without Changing Your Face
When preparing a visa-style photo, avoid heavy edits. Do not try to reshape the face, change facial features, add artificial details, or make the image look like a different person. Overediting can make the photo look unrealistic and may cause problems during review.
Instead, focus on basic cleanup:
Correct the orientation.
Crop the image neatly.
Center the head and shoulders.
Remove unnecessary edges from the frame.
Keep the photo natural.
Make sure the face is easy to see.
Follow the instructions from the application page.
Every visa application can have its own photo requirements, so always check the official instructions for the specific application before uploading. This article is about practical file preparation, not a guarantee of acceptance.
Step-by-Step: How to Prepare a Visa Photo for Online Upload
Step 1: Start With the Clearest Photo You Have
Choose a photo that is sharp and evenly lit. A good starting image is easier to prepare than a blurry or dark one.
Before editing, check:
Are both eyes visible?
Is the face clear?
Is the image in focus?
Is the background simple?
Is the head fully visible?
Are there heavy shadows?
Is the photo recent enough for your purpose?
Do not rely on editing to fix a poor original image. Basic preparation can improve framing, but it cannot fully repair a blurry, badly lit, or heavily distorted photo.
Step 2: Check the Application Instructions
Before cropping, read the upload requirements. Some applications may list rules for size, file format, dimensions, background, face position, or file weight.
Look for instructions such as:
Accepted file types
Maximum file size
Minimum pixel dimensions
Head position guidance
Background requirements
Photo age requirements
Whether glasses, hats, or shadows are allowed
Requirements can vary by country, application type, and portal. Follow the instructions shown on the application page instead of guessing.
Step 3: Fix the Orientation
A sideways or upside-down photo can cause upload problems and make the application look unfinished. If the image was taken on a phone, it may display correctly in your gallery but upload sideways to a website.
Use a document editing tool to rotate the photo before uploading. This is one of the safest edits because it does not change your appearance; it simply makes the image face the correct direction.
Step 4: Crop the Photo Carefully
Cropping is important, but it is easy to crop too much. If the crop is too tight, the top of the head, hair, chin, or shoulders may be cut off. If the crop is too loose, the face may appear too small in the upload preview.
A careful crop should keep:
The full head visible
The face centered
A small amount of space above the head
Shoulders balanced when required
No important facial details near the edge
A clean, simple frame
Do not crop the image just to make it look like a portrait from social media. Visa-style uploads usually need a practical, clear image rather than a dramatic crop.
Step 5: Remove Messy Visible Borders
Sometimes a photo includes extra edges, such as a wall corner, dark frame, table edge, or background area that distracts from the face. Cropping those visible borders can make the image cleaner.
However, do not remove so much background that the face becomes too close to the edges. The goal is clean framing, not extreme zooming.
Step 6: Avoid Heavy Filters and Beauty Edits
This is one of the most important steps. Avoid filters that change skin texture, reshape the face, enlarge the eyes, smooth the image too much, or alter natural features.
Do not use:
Face reshaping
Heavy skin smoothing
Artificial makeup effects
Background effects that look unrealistic
Color filters
Dramatic contrast changes
AI-style transformations
Edits that change facial details
A visa-style photo should look like a clear, natural image of the person. Simple preparation is safer than overediting.
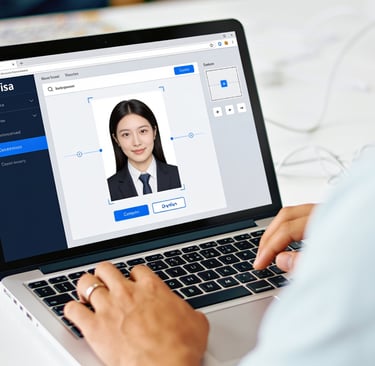
Step 7: Use Document Editor for Basic Preparation
ImageToSend’s Document Editor can help with practical adjustments such as cropping, rotating, flipping, fixing orientation, cleaning visible borders, and preparing document-style photos before upload.
For this task, use it mainly to:
Rotate the photo correctly
Crop the image neatly
Remove unnecessary border space
Check the framing
Prepare a cleaner upload version
Keep the edits simple and realistic. The tool helps prepare the file, but you should still follow the requirements from the visa application page.
Step 8: Preview the Final Image Before Uploading
Before submitting, open the edited photo and review it carefully.
Ask yourself:
Is the photo upright?
Is the face centered?
Is the head fully visible?
Is the crop too tight?
Is the image still natural?
Is the background simple?
Does the file match the upload instructions?
Did I avoid heavy editing?
This final preview can help you catch small mistakes before the upload.
Practical Example
Imagine you took a visa-style photo with your phone. The image is clear, but it has three problems:
It uploads sideways.
There is too much wall space on the left.
The head is slightly off-center.
Instead of using filters or changing the face, you can prepare it with simple edits:
Rotate the photo upright.
Crop some extra wall space.
Keep the full head visible.
Center the face and shoulders.
Save the prepared version.
Check it against the application instructions.
Upload the final image.
This keeps the photo natural while making it cleaner for online submission.
Common Mistakes to Avoid
Cropping Too Close
A tight crop can cut off hair, chin, ears, or shoulders. Leave enough space so the photo does not look cramped.
Overediting the Face
Do not change facial features. A photo that looks overly edited may look less suitable for an official-style upload.
Ignoring the Portal Requirements
Do not assume all visa photos use the same rules. Always check the requirements for the exact application.
Uploading a Sideways Photo
Phone photos sometimes rotate incorrectly when uploaded. Preview the final file before submitting.
Using a Busy Background
A distracting background can make the photo look less clean. Use a simple background when taking the original photo, and crop unnecessary edges when needed.
Changing the Image Too Many Times
Repeated editing can reduce quality or create confusion between versions. Keep the original and create one clean final file for upload.
Final Checklist Before Uploading
Before you upload your visa-style photo, check this list:
The photo is clear and in focus.
The image is facing the correct direction.
The face is centered.
The full head is visible.
The crop is not too tight.
The background is simple.
Visible messy borders are removed.
The photo still looks natural.
No heavy filters were applied.
The file matches the application upload instructions.
You previewed the final image before submitting.
Conclusion
Preparing a visa-style photo for upload does not mean heavily editing the image. In most cases, the best approach is simple: correct the orientation, crop carefully, keep the face centered, remove distracting edges, and avoid edits that change your appearance.
When you prepare a visa photo for online upload, focus on clarity and natural presentation. ImageToSend’s Document Editor can help with basic crop and orientation adjustments so your photo is cleaner and easier to upload, while still keeping the image realistic and practical.
FAQ
Can I edit a visa photo before uploading it?
You can usually make basic preparation edits such as cropping, rotating, and fixing orientation. Avoid edits that change your face, features, or natural appearance.
Can ImageToSend guarantee my visa photo will be accepted?
No. ImageToSend can help prepare the file, but acceptance depends on the requirements and review process of the specific application.
What should I avoid when preparing a visa photo?
Avoid heavy filters, face reshaping, artificial background effects, extreme skin smoothing, and crops that cut off important parts of the head or face.
Which ImageToSend tool should I use for a visa-style photo?
Use Document Editor when you need to crop, rotate, fix orientation, or clean visible borders before uploading your photo.
Need to prepare a visa-style photo before uploading? Use Document Editor at https://imagetosend.com to crop, rotate, and check your photo before submission.
ImageToSend
Practical tools and guides to compress PDFs, resize images, and prepare ID and passport photos for online uploads.
Contact
© 2026 ImageToSend. All rights reserved.
Quick Links