
Fix ID Photo Upload Errors
Learn how to fix ID photo upload errors by checking crop, orientation, file size, and format before submitting official-style photos online today with ease.
ID & PASSPORT PHOTOS
7/1/20266 min read
How to Fix ID Photo Upload Errors Before Submitting Online
You are trying to upload an ID-style photo, but the website keeps showing an error. The photo may look fine on your phone, but the upload page says it is too large, too small, the wrong format, badly framed, or not accepted. Sometimes the error message is clear. Other times, the page simply refuses the image.
This is frustrating because ID-style photos often need to meet specific upload rules. A photo can fail even when your face is visible and the image looks normal in your gallery. To fix ID photo upload errors, you need to check more than just how the photo looks. You also need to review crop, orientation, file size, format, dimensions, and the upload preview.
This guide explains the most common reasons ID photo uploads fail and how to prepare your image before submitting it online. It does not guarantee official acceptance, because every platform has its own rules, but it can help you avoid common preparation mistakes.
Why ID Photo Upload Errors Happen
ID-style photo upload errors usually happen because the image does not match the technical or visual requirements of the upload page. Common causes include file size limits, wrong dimensions, unsupported formats, or file issues such as naming and metadata problems. [1]
For ID and passport-style photos, requirements can be especially strict. Some official upload pages check image dimensions, file type, face position, background, and overall framing. For example, official photo upload guidance may list accepted formats and technical requirements that users need to follow before submitting. [8]
The important point is this: a photo can look acceptable to you but still fail the upload system.
Fix ID Photo Upload Errors by Checking the Basics First
Before editing the photo, read the instructions on the upload page. Look for details such as:
Accepted file formats
Maximum file size
Minimum and maximum dimensions
Required background style
Face position requirements
Whether the photo must be portrait orientation
Whether the image must be recent
Whether shadows, glare, or head coverings are restricted
Different portals can have different rules. Some may accept JPG or PNG, while others may accept additional formats. Some may require a specific pixel range or image size. Because requirements vary, the upload page should always guide your final decision.
Step 1: Check the File Format
The first thing to check is the file type. Many upload systems only accept certain formats. A photo may fail if it is saved as a format the portal does not support.
Common formats include:
JPG or JPEG
PNG
HEIC or HEIF
WebP
Some official systems accept several image formats, but not all portals do. If your phone saves photos as HEIC, the upload page may reject the image if that format is not supported.
Before changing anything else, confirm that the format matches the upload instructions.
Step 2: Check the File Size
A file can fail because it is too large. Modern phone cameras often create high-resolution images that are much heavier than an online form needs.
Check the file size on your device. If the upload page lists a limit, compare your photo to that limit. If the image is above the allowed size, you may need to prepare a smaller version.
Do not make the image extremely small just to pass the limit. If you reduce it too much, the face may become blurry or pixelated. The goal is to stay within the upload rules while keeping the photo clear.
Step 3: Check the Image Dimensions
Image dimensions are not the same as file size. Dimensions refer to width and height in pixels. For example, a photo may be 1200 x 1600 pixels.
Some upload pages require a minimum and maximum pixel range. A photo may fail if it is too small, too large, too narrow, or too wide. Some visa or passport photo upload pages provide exact dimension ranges, which shows why checking the requirement matters before submitting. [2]
If the image dimensions are wrong, resizing or cropping may be needed. But be careful not to stretch the photo. Stretching can distort the face and make the image look unnatural.
Step 4: Fix the Orientation
Phone photos sometimes upload sideways even if they look correct in your gallery. This can happen because the image contains orientation information that some websites read differently.
Open the image outside your gallery and check whether it appears upright. If it is sideways or upside down, rotate it before uploading.
This is where ImageToSend’s Document Editor can help. It is useful for basic document-style preparation such as cropping, rotating, fixing orientation, and cleaning visible borders before upload. Use it to correct the presentation of the photo without changing your appearance.
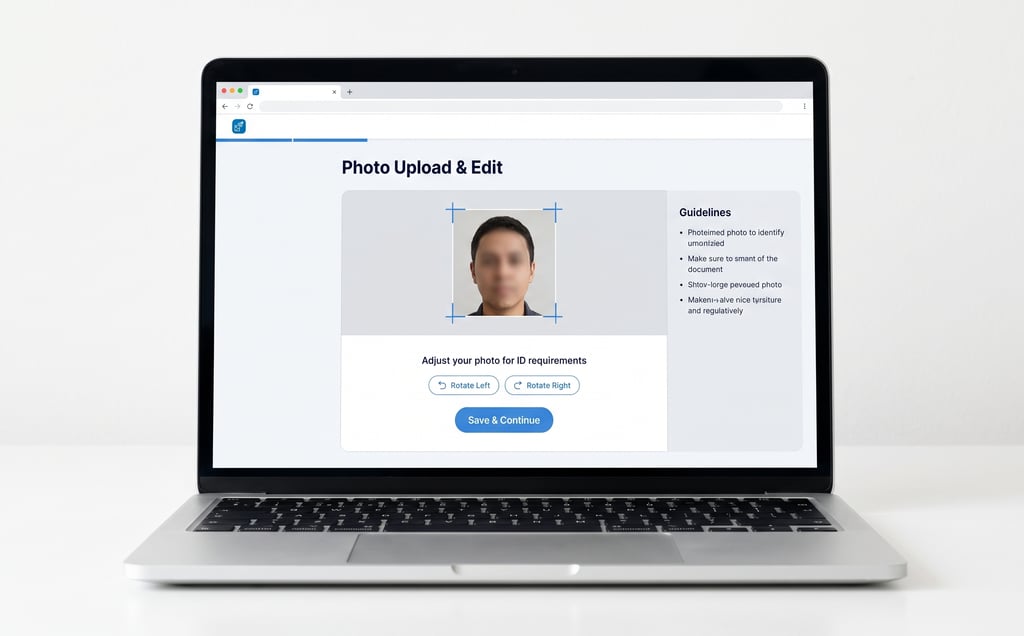
Step 5: Check the Crop and Framing
For ID-style photos, crop and framing matter. The upload page may reject the image if the face is too close, too far away, too low, too high, or partly cut off.
Check that:
The full head is visible.
The face is centered.
The chin is not cut off.
The top of the head is not cut off.
The shoulders are balanced when visible.
There is not too much empty space.
The photo is not cropped too tightly.
If the photo preview shows your face too large or too small, adjust the crop carefully. Do not crop just for style. Crop for clarity and compliance with the upload instructions.
Step 6: Avoid Overediting the Photo
A common mistake is trying to “fix” the photo with heavy edits. ID-style photos should usually look natural and realistic.
Avoid:
Face reshaping
Heavy beauty filters
Artificial skin smoothing
Changing facial features
Adding fake backgrounds
Over-brightening the image
Removing natural details
Making the photo look AI-generated
Simple preparation is usually safer: rotate, crop, remove messy borders, and make sure the image is clear. Do not change the person’s identity or create a misleading image.
Step 7: Preview the Upload Version
Before submitting, open the final image and review it carefully. Do not rely only on the file name or thumbnail.
Ask yourself:
Does the image open correctly?
Is the photo upright?
Is the face centered?
Is the crop too tight?
Is the image clear?
Does the file format match the portal?
Is the file size within the limit?
Does the preview show the full face?
If the upload page gives a preview, use it. The preview can reveal problems that are not obvious in your phone gallery.
Practical Example
Imagine you need to upload an ID-style photo for an online account. The photo looks fine on your phone, but the portal rejects it.
You check the file and find three problems:
The photo is saved as HEIC.
The image is sideways in the upload preview.
The crop cuts too close to the top of the head.
A better workflow would be:
Check the accepted formats on the upload page.
Prepare the image in an accepted format if needed.
Use Document Editor to rotate the photo upright.
Crop the photo carefully while keeping the full head visible.
Save the prepared version.
Open it before uploading.
Try the upload again.
This process does not guarantee acceptance, but it can reduce common upload preparation errors.
Common Mistakes to Avoid
Ignoring the Upload Instructions
Do not assume every ID photo portal uses the same rules. Always check the instructions shown on the specific upload page.
Uploading a Sideways Photo
A sideways photo can fail or look unprofessional. Rotate the image before submitting.
Cropping Too Close to the Face
A tight crop can remove important parts of the head, hair, chin, or shoulders. Leave enough space according to the upload rules.
Using the Wrong File Format
If the portal accepts JPG but your phone saved HEIC, the upload may fail. Check the accepted formats first.
Making the Image Too Small
Reducing the image too much can make the face blurry. Keep the photo clear and readable.
Overediting the Image
Avoid changes that alter your face or make the image look artificial. Use simple preparation only.
Final Checklist Before Uploading
Before submitting your ID-style photo, check this list:
The file format is accepted.
The file size is within the limit.
The image dimensions match the instructions when listed.
The photo is upright.
The face is centered.
The full head is visible.
The crop is not too tight.
The photo is clear and not blurry.
The background is not distracting.
No heavy filters were used.
The upload preview looks correct.
The file was opened and checked before submission.
Conclusion
ID photo upload errors often happen because of technical or framing issues, not because the photo is completely unusable. The file may be too large, too small, sideways, unsupported, badly cropped, or unclear in the upload preview.
To fix ID photo upload errors, start by reading the portal instructions. Then check format, file size, dimensions, crop, orientation, and clarity. Keep edits simple and avoid changing your appearance.
ImageToSend’s Document Editor can help you crop, rotate, and prepare a cleaner ID-style photo before uploading, while keeping the focus on practical file preparation.
FAQ
Why does my ID photo upload keep failing?
It may fail because the file is too large, the format is unsupported, the dimensions are outside the allowed range, the crop is wrong, or the photo is sideways.
Can I crop an ID photo before uploading?
Yes, basic cropping can help if the image has too much empty space or messy borders. Avoid cropping too tightly or cutting off the head, chin, or shoulders.
Can ImageToSend guarantee my ID photo will be accepted?
No. ImageToSend can help prepare the file, but acceptance depends on the rules and review process of the specific platform.
Which ImageToSend tool should I use?
Use Document Editor when you need to crop, rotate, fix orientation, or clean visible borders before uploading an ID-style photo.
ImageToSend
Practical tools and guides to compress PDFs, resize images, and prepare ID and passport photos for online uploads.
Contact
© 2026 ImageToSend. All rights reserved.
Quick Links